 T
o o l b a r sT
o o l b a r s
T
o o l b a r sT
o o l b a r s|
|
Operations on files
Edit commandsNew file
Create a new file. Sketch can open only one document at once time.
Open a file
This button opens a dialog box : choose the file to open.
Supported file formats are: Sketch (.sk), Adobe Illustrator (.ai), Corel (.cmx), SVG (new standard for the web) and WMF.
Sketch automatically recognize the type.
Save as
Save the current document. If the opened document was already saved in Sketch format, Sketch creates a backup file and save the file.
If the document was not previously saved, you must give it a name.
Sketch can save in Sketch (.sk) an Illustrator (.ai) formats..
Save As PostScript
Save the current drawing into a PostScript file. The file conforms to the EPS specification (I hope).
Edit Mode
Toggle Sketch into Edit Mode.
This mode gives access to nodes points allowing you to modify a curve.
See the Modes section for more details.
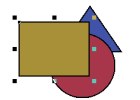
Selection Mode
Toggle Sketch into Selection Mode.
This mode allows you to select, resize, place, rotate objects.
See the modes section for more details.
Undo
Cancel the last operations. You can specify the number of cancels in the configuration options.
Redo
Sketch allows you to undo every operation and maintains a virtually unlimited undo history. If you really want to limit the undo history, you can do so from the preferences dialog (File/Options...).
Delete
Delete the current object (only in Selection Mode).
EffectsDuplicate
Create a duplicate of the current object just above the current object and select it. The duplicate is slightly offset. You can set the duplication offset in the preference dialog.
See also configuration options.
Objects dispositionVertical flip
Flip vertically an object or a group of objects.
Horizontal flip
Flip horizontally.
Grouping ObjectsMove To Top
Move the current object to the top of its layer.
-->
Move One Up
Swap the current object and the next higher one.
-->
Move One Down
Swap the current object and the next lower one.
-->
Move To Bottom
Move the current object to the bottom of its layer.
-->
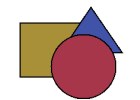
Group
Replace the currently selected objects with a group containing these objects and select it.
Ungroup
Replace the currently selected group with the objects it contains and select them.
Viewing Commands
UtilitiesZoom
After invoking the zoom command you can eitherThe maximum zoom factor is 1600%.
- Zoom into a region. Click and drag <Button1> to indicate a rectangular area in the main window. This area will be magnified such that it just fits into the window.
- Double the magnification Just click (and don't drag) <Button1> on a point in the main window. This point will be centered and the magnification factor doubled.
Snap To Grid
Turns the grid on (or off, if it's on). If gridding is on, objects will snap to grid points when they are edited.
This command doesn't affect the visibility of the grid. The visibility is controlled via the layer dialog. The grid is a special layer which is usually called "Grid".
See Layers section.
Objects creation
Draw a rectangle
Create a Rectangle by pressing the left mouse button and dragging the mouse. One corner of the newly created rectangle is where the button was pressed, the other where it was released. Holding <Ctrl> while dragging creates a square, holding <Shift> creates a rectangle or square centered on the starting point.In Edit Mode, you can drag the corners of a rectangle to create rounded corners.
Draw an ellipse
Create an Ellipse by pressing the left mouse button and dragging the mouse. Holding <Ctrl> while dragging creates a circle, holding <Shift> creates a ellipse or circle centered on the starting point.
In Edit Mode, you can drag the handle of an ellipse to create arcs.
Draw a curve
Create a Bézier curve. This requires at least two click-drag-release cycles. The first cycle defines the start point of the curve and its tangent. The next cycles define the rest of the points and tangents in the same fashion. Click <Button2> or press Space to finish.You can edit curves in Edit Mode and modify points with the curves menu or the Floating curves toolbox.
Draw a line
Create a polygon. The first click-drag-release cycle defines the first line segment. The next cycles define the rest of the segments. Click <Button2> or press Space to finish. The object created is actually a Bezier curve consisting only of straight lines.
Go in Edit Mode if you want to modify it.
Insert text
Create a text object by clicking where you want the text to be and type. If you click and drag you create rotated text.
You can modify the font in the floating fonts toolbox, you can transform the text into curves so as to modify it in Edit Mode, You can also apply special effects.This command opens a dialog box to let you specify the image file. After selecting the file, place the image on the page by clicking at the desired position. A dashed rectangle indicates the size and position.
Sketch can load any image the Python Imaging Library (PIL) can read. EPS files are not read by the PIL, they are imported and printed unmodified. Sketch uses Ghostscript to render a preview image, so an EPS file looks like an ordinary bitmap image on the screen.
Supported formats are : Joint Photographers Expert Group (.jpeg, .jpg), GIF (.gif), Portable Bitmap (.pbm), portable Greymap (.ppm), portable pixmap (.ppm), Targged Image File Format (.tif, .tiff), windows, OS2 bitmap (.bmp), PCX (.pcx), Portable Network Graphic (.png).
|
|
|
|
|
|