Abstract
![]() WebDAV
(Web-based Distributed Authoring and
Versioning) is an extension to the HTTP
protocol which allows you to create, move, copy, and delete
resources on a remote web server. In practice, mounting a
remote WebDAV repository on your local
machine allows you to modify a remote web server's files
as if those files were local to the system.
WebDAV
(Web-based Distributed Authoring and
Versioning) is an extension to the HTTP
protocol which allows you to create, move, copy, and delete
resources on a remote web server. In practice, mounting a
remote WebDAV repository on your local
machine allows you to modify a remote web server's files
as if those files were local to the system.
![[Tip]](images/tip.png) |
Tip |
|---|---|
Browse the WebDAV Resources pages to learn more about this extension. |

The first time you launch this tool the required packages are installed if needed, and only two buttons are available. , which allows you to define a new mount point, the other one just s the application. After you have defined the mount points, they will appear as new buttons at the top of the buttons list. Clicking on a mount point button will take you to the mount point menu (see Figure 6.7, “WebDAV Menu”).
When you click on
the button you are asked for the URL of
the web server. Enter the complete URL of the web server,
beginning with http:// or
https://, then click .
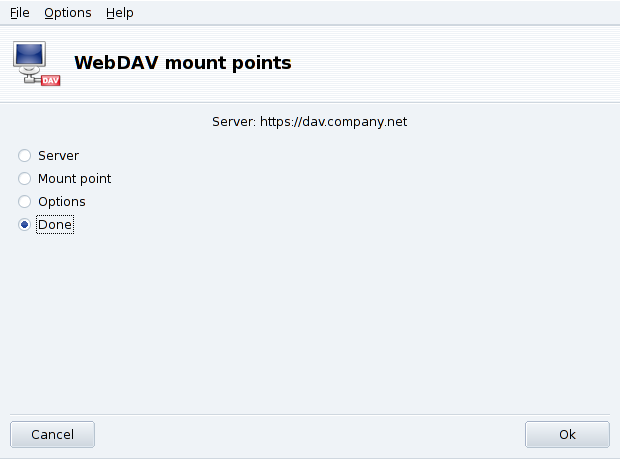
You must now decide where the web server files will be accessible from. Select the Mount point option and click . There you are able to choose a local directory or type in your own. If the selected mount point does not exist, it will be created.
If the server requires authentication, do not forget to fill the username and password fields in the Options dialog. Then all you need to do is to actually mount the remote repository by selecting Mount and clicking .
You are now able to browse and modify files on the local mount point you have defined and the changes will be immediately available on the web server.
To make your
settings persistent between sessions, remember to save
modifications to the /etc/fstab file, as
suggested when you quit the wizard.