![[Tip]](images/tip.png) |
Tip |
|---|---|
Before connecting to the Internet, you are encouraged to set up a firewall on your machine so as to avoid bad surprises such as intrusions into your system. You can set up a very simple, yet effective firewall using DrakFirewall. Please refer to Section 1, “Securing your Internet Access via DrakFirewall” for more information. |
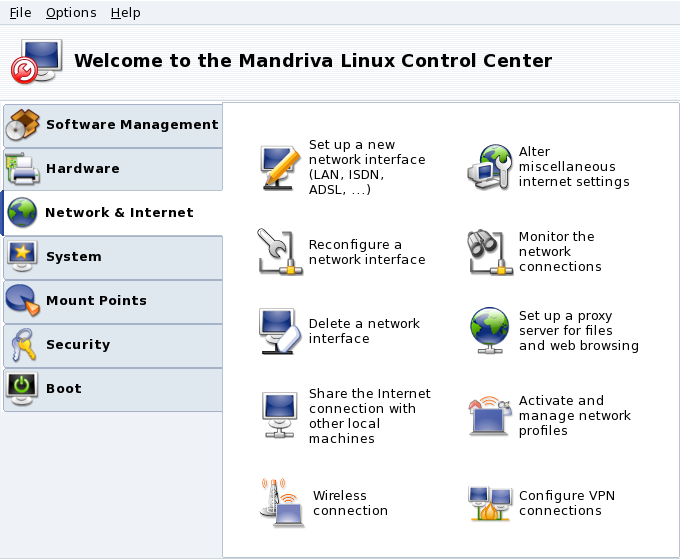
The drakconnect set of tools allows you to easily configure your network access, whether it be to the Internet or to a local network. Open Mandriva Linux Control Center and select the Network & Internet section to access drakconnect tools. A view of the main interface is shown in Figure 7.1, “DrakConnect Tools”.
![]() drakconnect supports different types of
Internet and network connections. The first step consists of
choosing which type of connection you want to configure. Always
make sure you have all the information provided by your ISP or
network administrator at hand.
drakconnect supports different types of
Internet and network connections. The first step consists of
choosing which type of connection you want to configure. Always
make sure you have all the information provided by your ISP or
network administrator at hand.
![[Note]](images/note.png) |
Note |
|---|---|
After a connection has been configured, it can be further modified using the Manage Connections interface (see Section 1.3, “Reconfiguring Interfaces”). |
-
Select the Ethernet type
Your NICs are detected automatically; if you have more than one, you need to select the one you want to configure. You can also load a driver for your NIC manually.
-
Automatic or Static Configuration
You now have to specify whether the network parameters are automatically set up (Automatic IP (BOOTP/DHCP)) or not (Manual configuration): fill the next steps with the parameters that your ISP or network administrator gave you.
-
Connection Control
- Allow users to manage the connection
If you want users to be able to bring up or shutdown the connection without having to provide the
rootpassword (see Section 1.4, “Monitoring Connections”) check this box.- Start the connection at boot
Uncheck this if you want the connection to be activated on demand only.
This entry allows you to configure WiFi PCMCIA or PCI devices.
-
Select the Wireless type
If your WiFi card is not listed, choose the Use a Windows driver entry. Then, select the driver from the manufacturer's card drivers CD.
-
Choose Network
A list of detected networks is then shown. Select yours; otherwise, choose unlisted.
-
Wireless Settings
- Operating Mode
The mode the card will operate on, with respect to the other WiFi devices in the network. The most common one is to simply connect to an existing access point.
- Network Name (ESSID)
The name of the network you want to connect to. Ask your network administrator.
- Encryption Mode
This depends on the network settings, ask your network administrator.
- Encryption Key
This also depends on the network settings, ask your network administrator for the key the network uses.
-
Network Configuration
This is similar to the traditional Ethernet network setup: see Section 1.1.1, “Wired Ethernet Connection”.
-
Connection Control
Check the Allow access point roaming box if you want the connection to automatically switch from one access point to another, depending on its signal strength. This is particularly useful when moving a laptop around.
Managing Connections. Consult Section 3, “Managing Wireless Connections (Roaming)” to learn how to configure and manage various wireless networks.
Simply make sure you select the right parameters in all steps, concerning your area and provider.
The last step gives you the option to handle the connection status through the net applet. This can prove useful if you only need the Internet connection from time to time.
A list of detected modems is shown. If no modem was detected, only the Manual choice option is shown, click on and choose the communications port the modem is connected to. The required packages are installed.
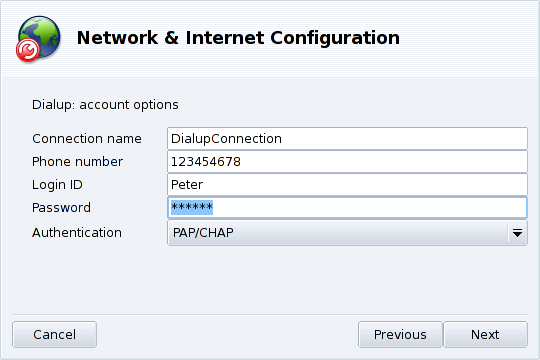
You then see a list of countries/ISPs. If yours is listed, select it and continue to the next step: some parameters (connection name, phone number to dial, and authentication scheme) will be automatically set. If not, select the Unlisted - edit manually option.
-
Verify the parameters, add the missing ones provided by your ISP.
All parameters should be obvious, except for the authentication type. The value in the Authentication pull-down depends on what your ISP supports: Script-based (an old type of authentication method based on “expect” and “send” types of chat between your system and your ISP); Terminal based (a terminal window pops up when the connection is made and you have to login interactively); PAP, CHAP, or PAP/CHAP (authentication information exchange protocols, CHAP is preferred because it is more secure, PAP/CHAP will automatically choose the supported one).
Then come the IP, DNS and gateway settings. Nowadays, most ISPs provide them automatically when a connection is made, so selecting the Automatic option on them is usually a safe bet.
-
Connection Control
Finally you are asked to test the connection: we recommend you to do so to make sure all parameters are accurate. You can now control your Internet connection using the net applet. You can also use the kppp remote access connection dialer (package
kppp) by choosing + → from the main menu.
This connection type is used for satellite connections.
Choose the connection card you want to configure, and then the adapter settings.
Network configuration is then similar to the LAN connection type (see Section 1.1.1, “Wired Ethernet Connection”).
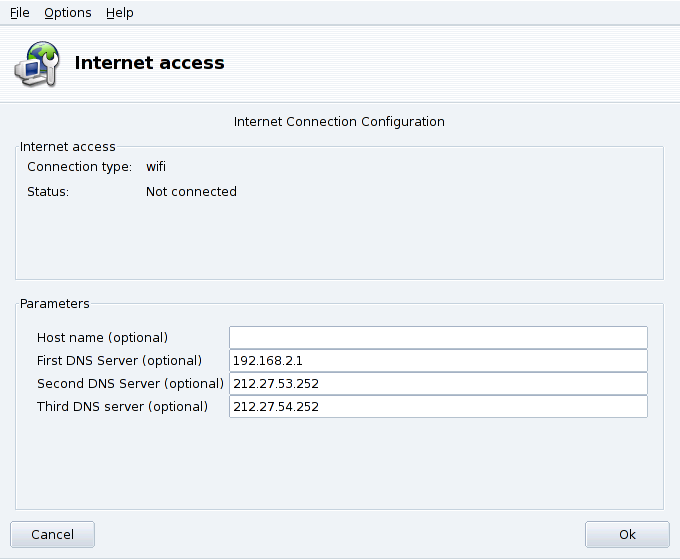
![]() This tool allows you to specify Internet access
parameters if they need to be modified after your initial
configuration. Please bear in mind that these parameters are
system-wide and apply to all interfaces. To change the gateway
address see Section 1.3, “Reconfiguring Interfaces”.
This tool allows you to specify Internet access
parameters if they need to be modified after your initial
configuration. Please bear in mind that these parameters are
system-wide and apply to all interfaces. To change the gateway
address see Section 1.3, “Reconfiguring Interfaces”.

![]() This tool allows you to modify network
interface-specific parameters, after you have set them up through
the new interface wizard (see Section 1.1, “Setting Up a New Network Interface”). Use the drop-down list at the top to
select the interface you want to configure. The tabs allow you to
change parameters and options according to the network interface
type selected.
This tool allows you to modify network
interface-specific parameters, after you have set them up through
the new interface wizard (see Section 1.1, “Setting Up a New Network Interface”). Use the drop-down list at the top to
select the interface you want to configure. The tabs allow you to
change parameters and options according to the network interface
type selected.
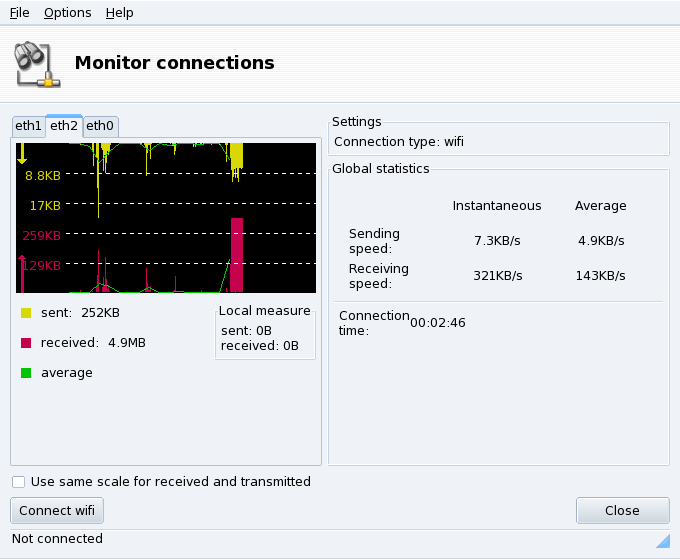
![]() This tool shows network interface
activity. You can specify some options for the traffic graphic and
statistics: update interval, scale, etc. (see Figure 7.5, “Real-Time Network Connection Monitoring”). It can also be used to
control the status of the network connection, bringing it up or
down using the button at the lower left.
This tool shows network interface
activity. You can specify some options for the traffic graphic and
statistics: update interval, scale, etc. (see Figure 7.5, “Real-Time Network Connection Monitoring”). It can also be used to
control the status of the network connection, bringing it up or
down using the button at the lower left.
![]() This tool simply allows you to remove a network
interface. Select the interface to be removed in the Net
Device pull-down list.
This tool simply allows you to remove a network
interface. Select the interface to be removed in the Net
Device pull-down list.
![[Warning]](images/warning.png)
![]() If your Internet connections must (or can) pass
through a proxy, this tool allows you to define the hostnames or
IP addresses of proxies for the FTP and HTTP protocols. Fill
the fields with the required values and click
.
If your Internet connections must (or can) pass
through a proxy, this tool allows you to define the hostnames or
IP addresses of proxies for the FTP and HTTP protocols. Fill
the fields with the required values and click
.
What's a Proxy. A proxy is a server that retrieves information from the Internet on your behalf, keeping a local copy of the web pages that are most frequently requested. They are referred to as “caching proxies”, and optimize bandwidth usage. In some organizations, you cannot access the Internet directly. You must pass through a proxy that authenticates you before allowing you to connect to the Internet. This is usually combined with a firewall that only guarantees the proxy direct access to the Internet. They are referred to as “authentication proxies”. In corporate or business environments, proxies perform both caching and authentication functions for performance and security reasons.